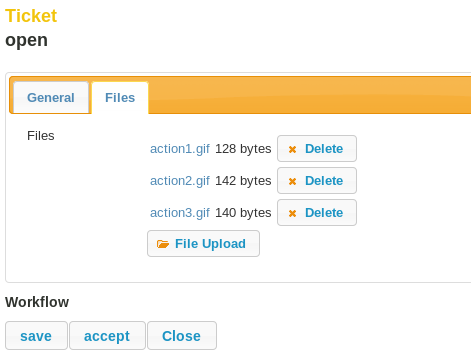
HOW TO CHANGE THE MYSQL DATABASE ENGINE

When you are running Imixs Workflow on a Linux Server using MySQL the database default engine is typically ‘MyISAM’. This is a fast engine type.

But for transactional systems it is recommended to use a database engine which is supporting transactions. This database engine in MySQL is called ‘InnoDB’. When you change the default engine type in your MySQL setup an new Imixs Workflow instance will create tables based on this engine type. But you can also simply change the engine type from ‘MyISAM’ to ‘InnoDB’ with a sql script:

ALTER TABLE `CALENDARITEM` ENGINE = InnoDB;
ALTER TABLE `DOUBLEITEM` ENGINE = InnoDB;
ALTER TABLE `ENTITY` ENGINE = InnoDB;
ALTER TABLE `ENTITYINDEX` ENGINE = InnoDB;
ALTER TABLE `ENTITY_CALENDARITEM` ENGINE = InnoDB;
ALTER TABLE `ENTITY_DOUBLEITEM` ENGINE = InnoDB;
ALTER TABLE `ENTITY_INTEGERITEM` ENGINE = InnoDB;
ALTER TABLE `ENTITY_READACCESS` ENGINE = InnoDB;
ALTER TABLE `ENTITY_READACCESSENTITY` ENGINE = InnoDB;
ALTER TABLE `ENTITY_TEXTITEM` ENGINE = InnoDB;
ALTER TABLE `ENTITY_WRITEACCESS` ENGINE = InnoDB;
ALTER TABLE `ENTITY_WRITEACCESSENTITY` ENGINE = InnoDB;
ALTER TABLE `INTEGERITEM` ENGINE = InnoDB;
ALTER TABLE `READACCESS` ENGINE = InnoDB;
ALTER TABLE `READACCESSENTITY` ENGINE = InnoDB;
ALTER TABLE `TEXTITEM` ENGINE = InnoDB;
ALTER TABLE `WRITEACCESS` ENGINE = InnoDB;
ALTER TABLE `WRITEACCESSENTITY` ENGINE = InnoDB;

This sql script did not connect to a specific database. For this reason it is necessary that you connect fist to the database the changes should be assigend. To run the script you can use the mysql command line tool in the following way:

First save the script into a local script file (e.g ‘mysql_innodb_imixs’). This file will be called later from the mysql console.

Now connect into the mysql Server:

mysql -u root -p

next select the database where the engine should be changed:

mysql> connect mydatabase;

finally you can run the script with the following command (assuming the you have stored the script before into a file named ‘mysql_innodb_imixs’ which is located in the current directory) :

mysql> source  mysql_innodb_imixs;

Thats it. Now you tables will use the new Database engine ‘InnoDB’.

When you configure the JDBC Datapool connection from your Glassfish Server it is strongly recommended to use a ‘javax.sql.XADataSource’ connection. This DataSource type supports the transaction scope provided by the Imixs Workflow System.

How to build a Workflow Application

Imixs Workflow provides a workflow engine to implement human workflows. Human worflows are used in business applications when a business process is performed by different users. A ticket-system is a typical example for a workflow management system. Customers create a new ticket and the workflow system forwards the the ticket to a technical team to solve the ticket. After a member of the technical team has accepted and solved the ticket the workflow management system forwards the ticket to a quality manager to verify the solution. Finally the solution will be automatically forwarded to the customer. This is a simple example of human workflow inside a business application.

Imixs Workflow provides all the functionality to manage this kind of a business process. You can design the process with an eclipse based modeler to configure things like email notifications, security, dispatching and the process documentation.

The flowing tutorial shows how to run the Imixs Workflow engine in a Java EE 6 business application.

RUNNING IMIXS WORKFLOW IN A WEB MODULE

As the latest version 3.0.0 of Imixs Workflow supports the lightweight EJB model you can run the Imixs Workflow either in a application server like Glassfish or in a Java EE 6 web-container.
The Imixs Workflow engine is independent from a web framework but we recommend to use Java Sever Faces as JSF becomes the standard framework for Java EE web applications.
When you have started developing a new web application you can add the libraries of the Imixs Workflow engine directly into the /lib folder of your web module

  /
  +- lib/
  |  |- imixs-workflow-core.jar
  |  |- imixs-workflow-engine.jar
  |  |- imixs-workflow-faces.jar
  |  |- imixs-workflow-jax-rs.jar

If you are using Maven (which is recommended) you can simply add the following dependency into your pom.xml.

<!-- Imixs Workflow -->
		<dependency>
			<groupId>org.imixs.workflow</groupId>
			<artifactId>imixs-workflow-engine</artifactId>
			<type>jar</type>
			<version>3.0.0-SNAPSHOT</version>
		</dependency>
		
		<dependency>
			<groupId>org.imixs.workflow</groupId>
			<artifactId>imixs-workflow-jax-rs</artifactId>
			<type>jar</type>
			<version>3.0.0-SNAPSHOT</version>
		</dependency>

		<dependency>
			<groupId>org.imixs.workflow</groupId>
			<artifactId>imixs-workflow-faces</artifactId>
			<type>jar</type>
			<version>3.0.0-SNAPSHOT</version>
		</dependency>

Next you need to add a persistence.xml file into your web module. The persistence.xml file defines how the workitems managed by the Imixs Workflow Engine will be persisted into a database.

Add a additional file named persistence.xml into your web module :

        /
        +- WEB-INF/classes/META-INF/
        |  |- persistence.xml

The persistence.xml describes the location of you database. The following example shows a typical configuration using the Eclipselink driver provided by most JEE Application servers.

<?xml version="1.0" encoding="UTF-8"?>
<persistence version="1.0" xmlns="http://java.sun.com/xml/ns/persistence">
        <persistence-unit name="org.imixs.workflow.jee.jpa" transaction-type="JTA">     
                <provider>org.eclipse.persistence.jpa.PersistenceProvider</provider>    
                <jta-data-source>jdbc/workflow-db</jta-data-source>
                <jar-file>lib/imixs-workflow-engine-3.0.0-SNAPSHOT.jar</jar-file>
                <properties>
                        <property name="eclipselink.ddl-generation"
                                value="create-tables" />
                        <property name="eclipselink.logging.level" value="INFO"/>
                </properties>                           
        </persistence-unit>
</persistence>

The jta-data-source with the name “jdbc/workflow-db” describes the jdbc connection used to store the imixs workflow data. You can configure the database resource directly in your application server. For more details about how to setup a database connection read ‘Installation and setup the Glassfish Application Server‘.

ADDING SECURITY CONFIGURATION AND WEB SERVICE

Now as the Imixs Workflow engine is part of your web module you need to configure security roles expected by the Imixs Workflow.

To map the Imixs Workflow roles into your web application use the security-role-ref in the web.xml.

	<login-config>
		<auth-method>BASIC</auth-method>
		<realm-name>imixsrealm</realm-name>
	</login-config>

	<security-constraint>
		<web-resource-collection>
			<web-resource-name>restricted</web-resource-name>
			<url-pattern>/pages/*</url-pattern>
			<url-pattern>/rest/*</url-pattern>
			<http-method>GET</http-method>
			<http-method>POST</http-method>
		</web-resource-collection>
		<auth-constraint>
			<role-name>org.imixs.ACCESSLEVEL.READERACCESS
			</role-name>
			<role-name>org.imixs.ACCESSLEVEL.AUTHORACCESS
			</role-name>
			<role-name>org.imixs.ACCESSLEVEL.EDITORACCESS
			</role-name>
			<role-name>org.imixs.ACCESSLEVEL.MANAGERACCESS
			</role-name>
		</auth-constraint>
	</security-constraint>
	<security-constraint>
		<web-resource-collection>
			<web-resource-name>restricted</web-resource-name>
			<url-pattern>/RestService/*</url-pattern>
			<http-method>GET</http-method>
			<http-method>POST</http-method>
			<http-method>PUT</http-method>
		</web-resource-collection>
		<auth-constraint>
			<role-name>org.imixs.ACCESSLEVEL.MANAGERACCESS
			</role-name>
		</auth-constraint>
	</security-constraint>
	
	<security-role>
		<role-name>org.imixs.ACCESSLEVEL.NOACCESS
		</role-name>
	</security-role>
	<security-role>
		<role-name>org.imixs.ACCESSLEVEL.READERACCESS
		</role-name>
	</security-role>
	<security-role>
		<role-name>org.imixs.ACCESSLEVEL.AUTHORACCESS
		</role-name>
	</security-role>
	<security-role>
		<role-name>org.imixs.ACCESSLEVEL.EDITORACCESS
		</role-name>
	</security-role>
	<security-role>
		<role-name>org.imixs.ACCESSLEVEL.MANAGERACCESS
		</role-name>
	</security-role>


To map the roles to your user management and security groups for glassfish servers add the sun-web.xml file into your /WEB-INF folder:

<?xml version="1.0" encoding="UTF-8"?>
<!DOCTYPE sun-web-app PUBLIC "-//Sun Microsystems, Inc.//DTD Application Server 9.0 Servlet 2.5//EN" "http://www.sun.com/software/appserver/dtds/sun-web-app_2_5-0.dtd">
<sun-web-app error-url="">

	<context-root>/workflow</context-root>

	<security-role-mapping>
		<role-name>org.imixs.ACCESSLEVEL.NOACCESS</role-name>
		<group-name>Noaccess</group-name>
		<group-name>IMIXS-WORKFLOW-Noaccess</group-name>
	</security-role-mapping>

	<security-role-mapping>
		<role-name>org.imixs.ACCESSLEVEL.READERACCESS</role-name>
		<group-name>Reader</group-name>
		<group-name>IMIXS-WORKFLOW-Reader</group-name>
	</security-role-mapping>

	<security-role-mapping>
		<role-name>org.imixs.ACCESSLEVEL.AUTHORACCESS</role-name>
		<group-name>Author</group-name>
		<group-name>IMIXS-WORKFLOW-Author</group-name>
	</security-role-mapping>

	<security-role-mapping>
		<role-name>org.imixs.ACCESSLEVEL.EDITORACCESS</role-name>
		<group-name>Editor</group-name>
		<group-name>IMIXS-WORKFLOW-Editor</group-name>
	</security-role-mapping>

	<security-role-mapping>
		<role-name>org.imixs.ACCESSLEVEL.MANAGERACCESS</role-name>
		<group-name>Manager</group-name>
		<group-name>IMIXS-WORKFLOW-Manager</group-name>
	</security-role-mapping>
</sun-web-app>

Finally you can add the Imxis RESTfull Service interface to provide a business modeler directly from your eclipse ide using the Imixs Workflow modeler plugin. With the Imixs RESTfull Service you can access the Imixs Workflow engine from external clients.
To add the Rest Service add the following servlet description into your web.xml file:

	<!-- Imixs Rest Service -->
	<servlet>
		<servlet-name>Jersey Web Application</servlet-name>
		<servlet-class>com.sun.jersey.spi.container.servlet.ServletContainer</servlet-class>
		<init-param>
			<param-name>com.sun.jersey.config.property.packages</param-name>
			<param-value>org.imixs.workflow.jaxrs</param-value>
		</init-param>
		<load-on-startup>1</load-on-startup>
	</servlet>
		
	<servlet-mapping>
		<servlet-name>Jersey Web Application</servlet-name>
		<url-pattern>/rest/*</url-pattern>
	</servlet-mapping>

Thats it.
To build a workflow model and synchronize it with your workflow application see the Installation and setup guide of the Imixs Workflow Modeler.

IMIXS WORKFLOW AND JSF

Now the Imixs Workflow engine is part of your web application. To access the Imixs Workflow engine the imxis-faces module provides a BackingBean. You can add this BackingBean simply by extending the faces-config.xml file located in the /WEB-INF folder of you web project.

<managed-bean>
        <managed-bean-name>workflowMB</managed-bean-name>
        <managed-bean-class>org.imixs.workflow.jee.jsf.util.SimpleWorkflowController</managed-bean-class>
        <managed-bean-scope>session</managed-bean-scope>
</managed-bean>

To create a new workitem you call the method doCreateWorkitem. This method expects an existing process-id form your previous diefined workflow model. This is an example where you create a new instance of a business process with the processID=100

<h:commandButton
        value="create new...."
        actionListener="#{workflowMB.doCreateWorkitem}"
        action="show_workitem">
        <f:param name="id"
                value="100" />
</h:commandButton>

The workflowMB allows you to bind an input value to an arbitrary property name. See the following example were an inputText value is bound to the item property ‘txtSubject’.

 <h:inputText required="true"
        value="#{workflowMB.workitem.item['txtSubject']}" id="subject_id">
 </h:inputText>

The workflow controller will automatically manage the property “txtSubject” and store the input values into the database.
Finally you can process a workitem through the Imixs Workflow by simply calling the method doProcess :

 <h:commandButton action="show_workitem"
        actionListener="#{workflowMB.doProcessWorkitem}"
        value="submit">
        <f:param name="id" value="10" />
 </h:commandButton>

You can download the full sample application from the Imixs Download center. This sample application can be used as a template to start you own business workflow project.
You will find more examples and a full installation guide at: http://www.imixs.org/jee/install.html

NEW JAVA EE 6 WORKFLOW ENGINE

With the latest release 3.0 Imixs provides now the first full Java EE 6 compliant workflow engine. The BPM solution can be used together with any of the newest Java EE web- or application servers like Glassfish 3.1, JBoss 6 or Geronimo.

Imixs Workflow focus on human based workflow typical used in organisations and enterprises. The Imixs Workflow provides users with all necessary information during a business process, like task lists, a process documentation or messaging features. The workflow management system helps users to start a new process, finding a document and complete running jobs. Continue reading “NEW JAVA EE 6 WORKFLOW ENGINE”

IMIXS WORKFLOW 3.0 – NEW PROJECT STRUCTURE

As part of the new version 3.0 of the Imixs Workfow project the structure of the sub-projects will be simplified. In future only the artefacts

  • imixs-workflow-core
  • imixs-workflow-engine
  • imixs-workflow-faces

will be necessary to include all relevant APIs.

This simplifies the deployment and makes it much easier to manage complex projects. As a side effect also conflicts with the version 2.x can be avoided. The new 3.x version will be based on JEE6 and includes new JPA entities and EJB components.

Watch the Imixs project site and issue-tracking for details about the next release!

NEXT RELASE OF IMIXS WORKFLOW API

Today we released the final version of the Imixs-Workflow API 2.1.2 and the XML API 2.1.1.

These two releases are now stable and include a lot of minor improvements in general handling and also affecting the XML processing. We recommend to use these releases instead of earlier releases. The XML release 2.1.1 is important to stable the Imixs REST Service API.

LUCENE SEARCH WITH IMIXS WORKFLOW

The latest snapshot release of Imixs JEE Workflow now supports Apache Lucene Search Engine. With this new fulltext search the Imixs Workflow reached a new level of a flexible and powerful workflow platform.

The Lucene search integration is provided by a new plugin which contains all the necessary functionality to access and manage a search index. Workitems are automatically added into the search index during a workflow step. A fulltext search is performed considering the fine-grained access rights for workitems managed by the Imixs Workflow Engine. This means that a search result contains only workitems which are accessible by the current user. The access level to a single workitem is fully controlled by the Imixs Workflow Manager and can be managed using the Imixs Workflow Modeler. This makes it easy to setup complex and secure business process applications and support also the flexibility of a fulltext search engine.

RELEASE 3.0 STARTED

We are now starting the next release of the Imixs Workflow 3.0

See: http://java.net/jira/browse/IMIXS_WORKFLOW-90

The general idea behind the new 3.0 release was to make use of the new EJB 3.1 container features. Because the current Imxis EntityServiceBean is in some methodes a little bit deprecated. One reason was the early implementation in the beginning of JEE5. The JPA methods are optimized for Toplink Driver which is no longer supported. So its time to make an Update!

General requirements for the new Workfow Engine

  • Replace the Entity Bean based on ItemCollection with a Map Interface
  • Use of EJB 3.1 features (JPA Map Feature)
  • Simplify the packaging (Light EJB API)
  • Optimize Scheduler Feature (persist settings in a entity)
  • No changes to the Workflow Service API – to make migration easy

Migration

A Migration is necessary as one of the main goals is to pesist no longer the ItemCollection Object but a simple portable Map Interface.
So we need a way to migrate application from Version 2.x to 3.0. As we learned in migrations from 1.x to 2.x this is not an easy work.
The goal of the new migration strategy must be a background migration.
So a tool should migrate workitems from a old datastorage into a new one running independed of a productive workflow app. This can be done by monitoring the $modified timestamp. As we know most of the data will not be changed during migration this can be done easily .