
NOTE: Please see the latest tutorial how to run Imixs-Workflow with Jakarta EE.
In the first part of my tutorial I explained how you create a workflow model using the Imixs Workflow Modeler. This part now concerns about the setup of your application server on which you can run the workflow application later. I will describe the setup of the Application Server Glassfish which is common running a JEE application. But you can also use a different JEE application servers (e.g. JBoss, WildFly).
From the point of view of a workflow management system (WfMS) the application server is responsible for two important things: the authentication of a user and for storing workitems (a running process instance) into a database. As the Imixs Workflow is based on the Java EE specification this can be configured outside of our application using the application servers admin console. Next I will describe the two configuration steps.
Setup a Security Realm
To authenticate and authorize users to work with the Workflow application it is necessary to define a Security configuration. This is also called a Security realm. You can use and configure any authentication framework supported by your application server environment. But for testing I use a simple file based security Realm. Follow the steps below to setup a new security realm named “imixsrealm” in your glassfish server:
- start admin console -> http://localhost:4848/asadmin
- navigate to Configuration->server-config-Security->Realms
- add a new file realm named “imixsrealm”
- choose the class Name “com.sun.enterprese.security.auth.realm.file.FileRealm”
- Set the JAAS Context to “fileRealm”
- Set the Key File to a new File name. e.g. “imixskeyfile”
- press OK to create the new realm.
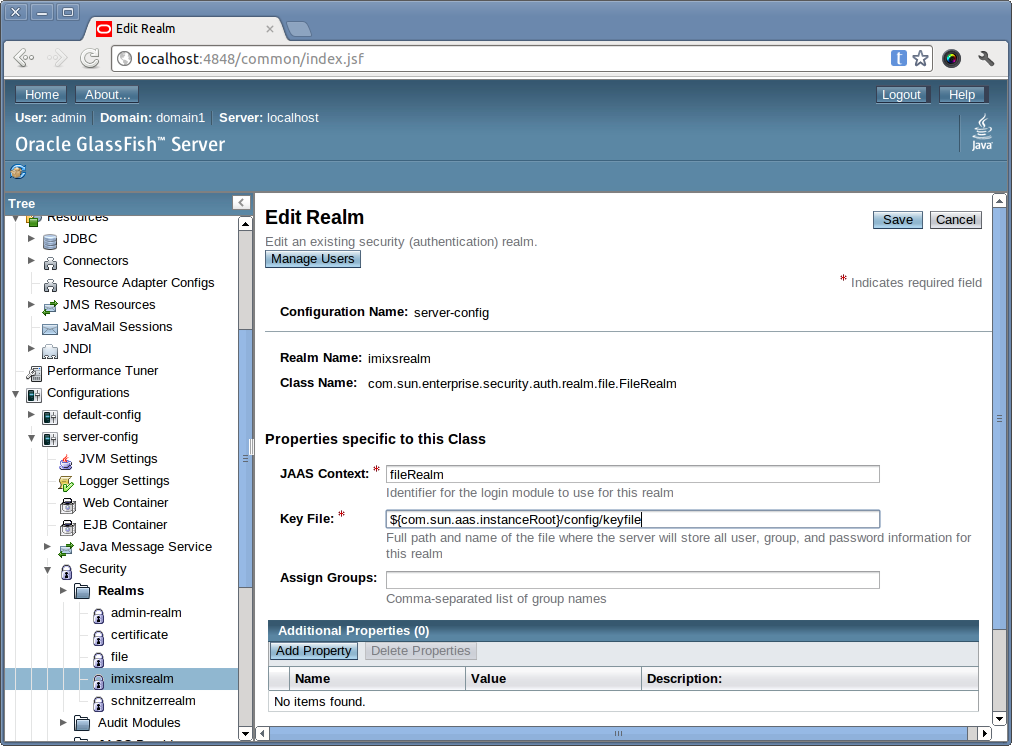
The name “imixsrealm” will be used by my workflow application to select the security configuration.
One part of the security realm is to authenticate a user who tries to access my application. The other part is to authorize a user and grant access to the workflow application. Therefor each user account needs to be owner of one of the Imixs security Roles defined by the Imixs JEE Workflow System. The security roles are mapped by a application to different access groups. So you need now to define different users assigned to different groups used by your application.
To add or mange a user open the new realm configuration and click on button “manage users”
I add the following test accounts and groups:
| UserID | Group | Description |
| Manfred | IMIXS-WORKFLOW-Manager | This user will have maximum access |
| Eddy | IMIXS-WORKFLOW-Editor | This user can edit allworkitems |
| Anna | IMIXS-WORKFLOW-Author | This user will be allowed to create workitems and edit his own |
| Ronny | IMIXS-WORKFLOW-Reader | This user will be only allowd to read workitems |
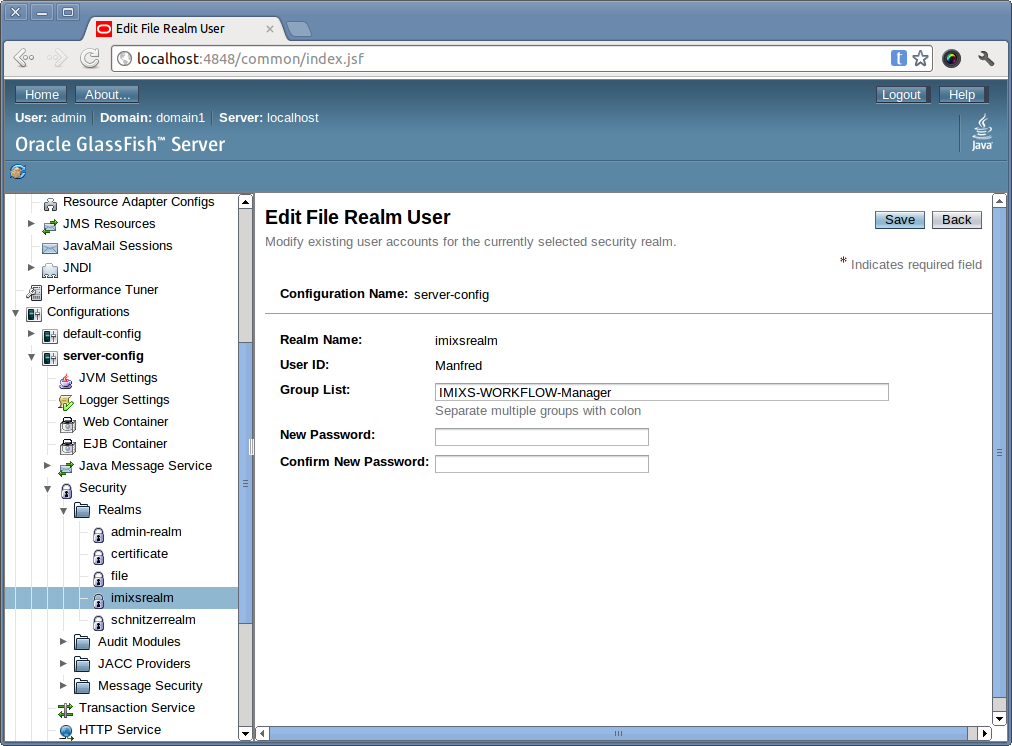
Please make sure that at least one userID is assigned to the role ‘IMIXS-WORKFLOW-Manager’.
Setup a Database Connection
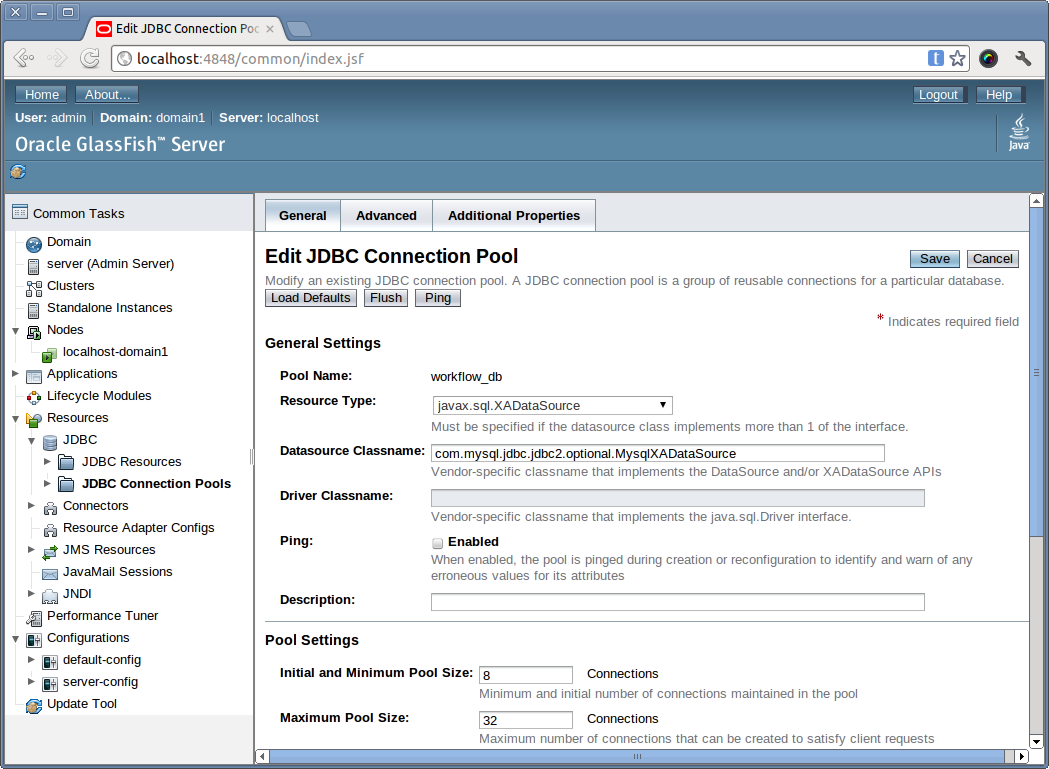
The next step is to setup a Database connection which can be used by your workflow application to store the workitems created and modified by users into a database. Again – as the Imixs Workflow depends on the Java EE specification the application is independent form a specific database vendor. I mostly like the MySQL Database, but you can use any other database system. The Java EE database connection is based on the JDBC standard and each connection defined by a server will be named unique by the JNDI Name. In this tutorial the application will expect a JDBC ressource with the name “jdbc/workflow-db”.
Before your setup a new Database connection in GlassFish you need to create an empty database on your database server (MySQL). You don’t need to create any tables or database schema, because this is done in the background during the deployment.
After you have created an empty database follow these steps to setup a new Database connection for MySQL in the glassfish server console:
- start admin console -> http://localhost:4848/asadmin
- navigate to Application Server > Resources > JDBC > Connection Pools
- click “new” to create a new database source
– name: your database name (e.g. “workflowdb”)
– resource type : javax.sql.DataSource
– Database Vendor : MySQL - click “next”. Now you can configure necessary properties depending on your database setting:
– DatabaseName: “workflowdb”
– URL: “jdbc:mysql://localhost:3306/workflowdb”
– Password: “*****”
– User: “root” - click “finish” to create the new connection. You can test the connection using the “ping” button in the configuration page. (Note: it is necessary that if you use MySQL place the MySQL jdbc driver (mysql-connector-java-5.1.7-bin.jar) into the folder : [glassfish-install]/domains/domain1/lib/ext/ )
- you can verify your connection using the ‘ping’ button in your connection pool configuration page.
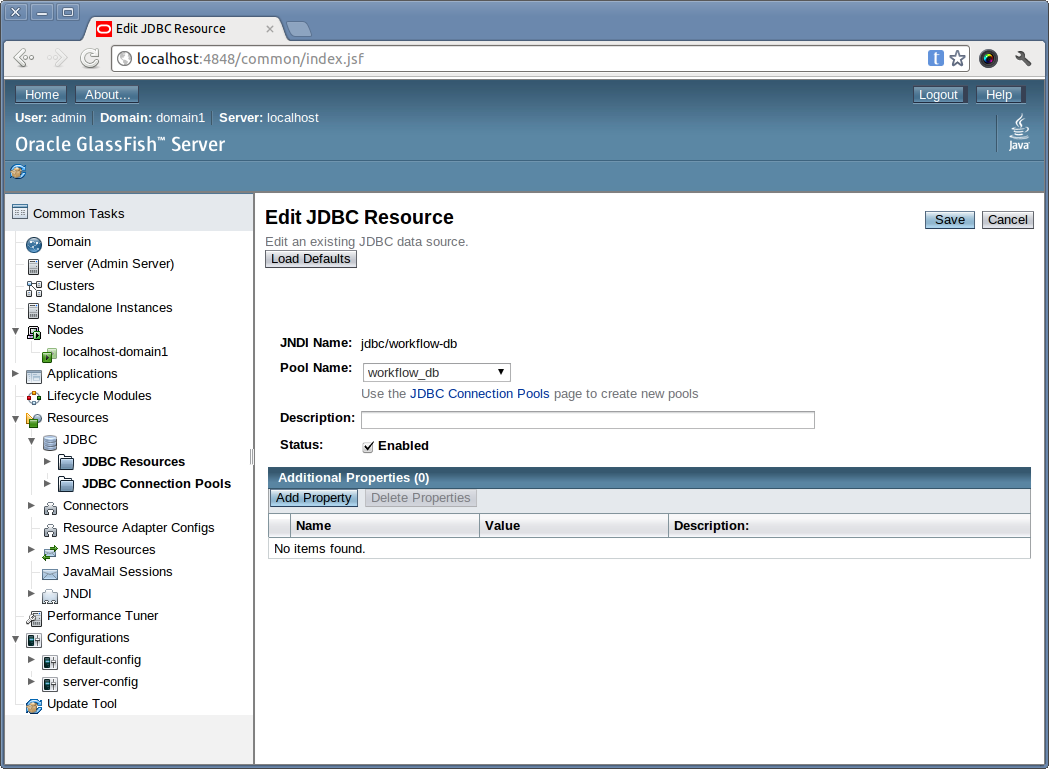
Next create a new JDBC Resource with the Name “jdbc/workflow-db”
- Navigate to “Application Server > Resources > JDBC > JDBC Resources”
- click “new” to create a new resource
– jndiName: jdbc/workflow-db
– PoolName: workflowdb (this is the name of the database connection created before)
Now that we have setup our application server I am ready to build and deploy my workflow application.